The purchase by file is made by importing a purchase spreadsheet from your computer to the Rastreador PariPassu. This process optimizes and streamlines your work, as with it you can make multiple purchases from different suppliers in a single operation.
This purchase sheet is what we call a file and it must contain all the information relevant to the purchases you are making, organized in a way that the Rastreador can read and import all the data. For this, the most important thing in this process is to make sure that your worksheet, your file, is made in accordance with the Rastreador's Necessary Specifications. Want to learn how to make a compatible spreadsheet and a sale per file? Check out the step by step in this article!
Check it out in this article:
How should be the file used?
The file used must be a spreadsheet in the .xls (Excel 2003-2007), .xlsx (Excel 2010 and newer) or .csv (semicolon-separated values) formats, whose information will be associated with the sales fields in the Rastreador.
For the system to correctly import your information, it is necessary that you place the fields correctly in the worksheet. Remembering that the fields mentioned below must be the columns of your worksheet, and the items you are going to buy (the products) must be added in the rows.
In this sense, we have created some suggestions for you, identifying which fields are mandatory, which fields we suggest to optimize your work and which additional fields you may want to use. Check below for more information:
Suggested information for file import:
We suggest that you use all of this information in your spreadsheet, even if not all of it is required. They will help make your records more complete and reliable.
- Purchase code: number or letter you use for control.
- Date: the date the purchase was made. In MM/DD/YYYY format.
Example: 15/10/2022. - Source document: it is mandatory to inform CPF or CNPJ with dots and dashes, referring to the product supplier.
Example: 123.456.789-10 - Batch: product batch.
- Product name: name of the purchased product.
- Packaging: name of the packaging of the purchased product.
Example: box, tray or bag. - Packing unit: unit of measurement used to represent the
packing capacity.
Example: Kg, UN or L. - Packaging capacity: volume that the packaging is able to accommodate.
- Quantity: Purchased quantity of the product.
Click HERE to download a spreadsheet template already filled in with the Suggested Fields.
Mandatory information for file import:
This is the information that must be included in your worksheet. You can use only these if you prefer, but we suggest that you include the Suggested Information in the previous box to make your records more complete.
- Source document: it is mandatory to inform CPF or CNPJ with dots and dashes, referring to the product supplier.
Example: 123.456.789-10 - Date: date the purchase was made. In MM/DD/YYYY format.
Example: 15/10/2022. - Product name: name of the purchased product
- Quantity: purchased quantity of the product.
Click HERE to download a spreadsheet template already filled in with the Required Fields.
Additional information (not mandatory):
This information is not mandatory, but you can use it to make your file even more complete.
- Supplementary source document: inform the rural registration of the supplier when selecting the type of file (Suggested fields or All fields) and saving the file on your computer.
Click HERE to download a spreadsheet template already filled in with All Fields (all suggested plus the optional field).
Attention: the Link of Origin document informed in the file refers to the CPF or CNPJ of your supplier and must, obligatorily, be registered in the Rastreador PariPassu as your supplier.
How to make a purchase by file?
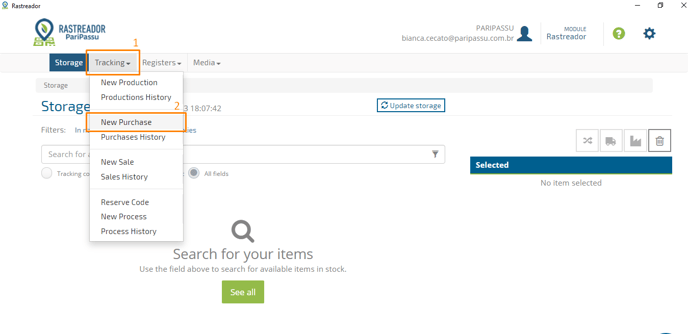
Step 1: Access your Rastreador PariPassu. In the main menu, click on “Tracking” and select the option “New Purchase”.
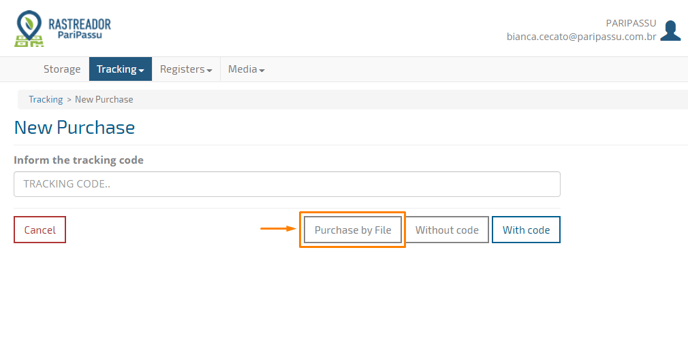
Step 2: Select the option “Purchase by file”.
Step 3: On the purchase by file screen, the system will display a field with the Instructions for importing your purchase file. In case of remaining doubts, you can access more information about the purchaise by file in there.
For your file purchase process to work correctly, it is very important that your file has the Necessary Specifications that we talked about in the previous item of this article.
In case you were in doubt about how to make a file according to the Specifications, please contact our support team, by clicking here.
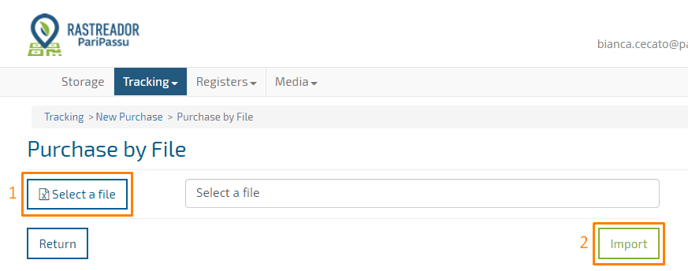
Step 4: Once you've ensured that your file meets the Required Specifications, it's time to import that file into the Rastreador. To do so, you must click on "Select file". The system will open your computer's folder for you to locate and select the file you want. After you select it, you must click on "Import".
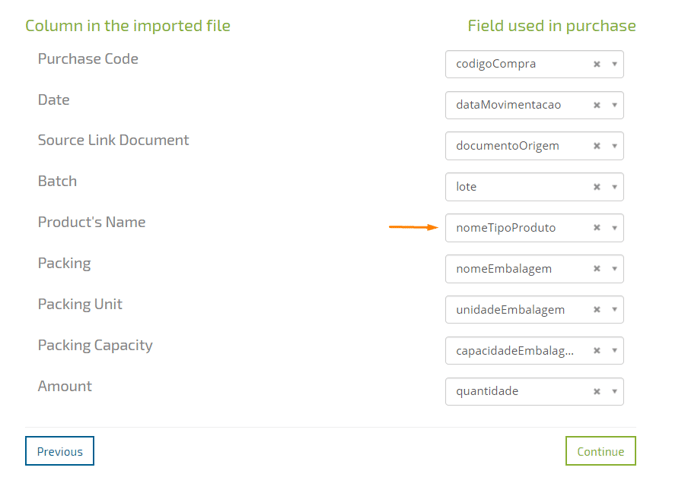
Step 5: After you import the file, it will be necessary to relate the columns of your file "Column in the imported file" to the purchase fields of the system "Field used in the purchase". To do this, click ![]() next to each field in the right column and select the option that corresponds to the left column of your worksheet.
next to each field in the right column and select the option that corresponds to the left column of your worksheet.
The correspondence is logical and intuitive, you can see in the image below that the Product's Name column corresponds to the field titled "NomeTipoProduto" (product type name in portuguese), for example.
Check out the example of a file import:
Don't worry, this step will only be necessary the first few times, so that the system correctly associates the information in your spreadsheet with the Rastreador's fields. After you make this association, the system will only ask you to repeat this process if there is a new field in your file, which has not yet been associated.
In this way, the information requested by the system will vary according to the data included in the file you imported.
Step 6: After linking the two columns, click on "Continue" (as shown in the image above).
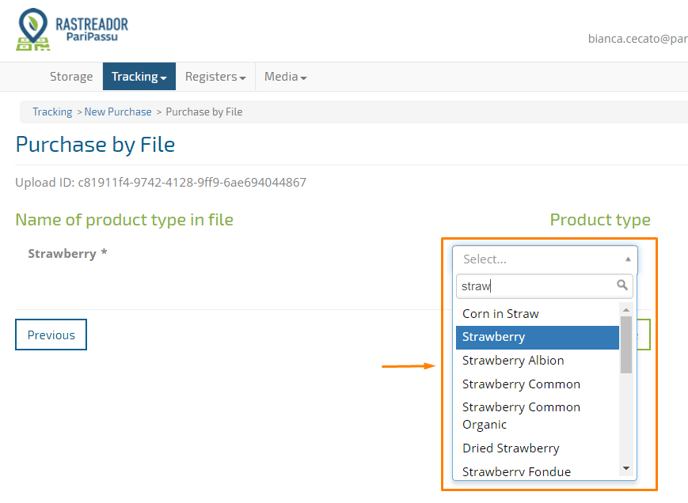
Step 7: Now is the time to match the products in your file with the products in the Rastreador system. The "Name of product type in file" field displays the name of the product that was in your file. In the "Product Type" field, you must type the name of the respective product you purchased and select the option registered in the system referring to the desired product.
Check out the example:
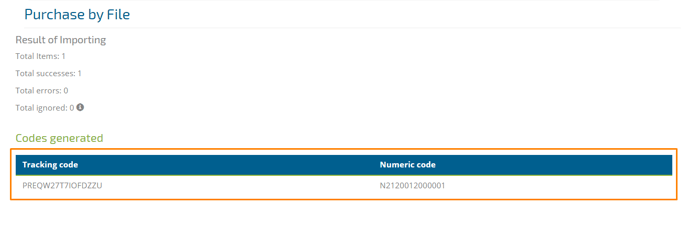
Step 8: When you finish this step, you should click "Continue" and the system will automatically present the "Import Result" screen. On this screen you will be able to follow the items imported successfully, the tracking code and the numerical code.
Step 9: If your import presents an error, the system will display the number of errors found in Total errors.
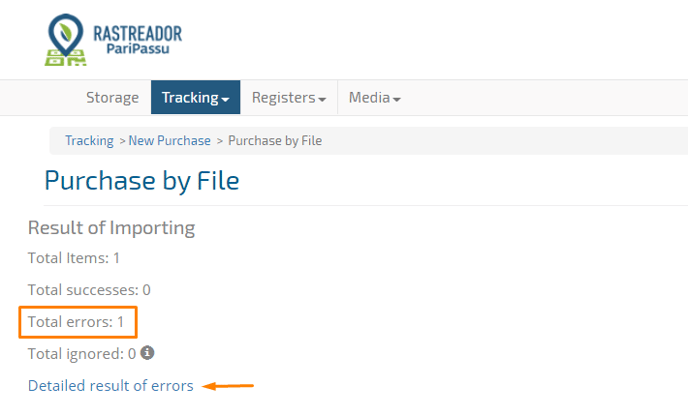
Step 10: You can find the details regarding the errors found in "Detailed result of errors", just click on this option and the system will open a new screen with the details of the errors found.
Check out the example below:
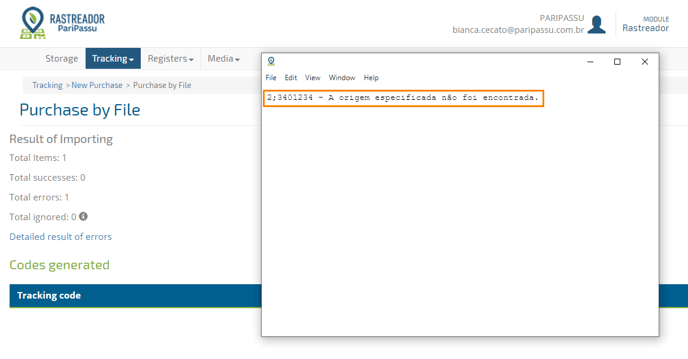
In this example, the CPF presented was not registered in the system like a valid Supplier. Therefore, it is necessary to add a new supplier with the CPF informed and then import the file again.
If any information appears in the "Ignored total" field, it means that the order has already been previously imported.
It's done! You have made a purchaise by file in your Rastreador. Remind that the process will be more pratic and fast the next time you make it, once the step 5 fields will be already complete and you will grow accostumed with the file model.
In case you want to view the information of your imported order again, just click on the “Tracking” field (in the Rastreador's main menu) and select the “Purchase History” option. To find your purchase, select the period of days in which it was made and click on the magnifying glass icon ![]() .
.
We hope the content was helpful.
Got any questions? Click here to contact our Customer Success Team! We will be happy to assist you!
See you later! 😊