Check this article:
- Adding the questionnaire
- Questionnaire settings
- Score settings
- Application settings
- Filling option
- Authorized users
- Report settings
- Email settings
- Groups
- Products
Adding the questionnaire
Step 1: The first thing you will have to do is access the CLICQ tool. To do so, use acesso.paripassu.com.br and add your email and password to login.
Step 2: On your PariPassu Access home screen, select the CLICQ tool.
Step 3: Now, on your CLICQ home screen, click on the icon ![]() to access the main menu, located on the left sidebar. Go to "Questionnaires" and then "New Questionnaire".
to access the main menu, located on the left sidebar. Go to "Questionnaires" and then "New Questionnaire".
To facilitate the configuration process, the system offers several models of questionnaires.
After selecting "New Questionnaire", the system will open the general settings screen, which will present the several customization steps. Follow the instructions below to complete each one:
Questionnaire settings
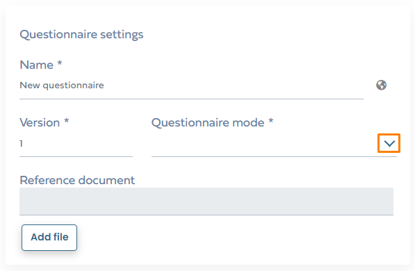
The first screen to be completed is the "Questionnaire Settings". Check below each field on this screen and how you should fill it in.

Field 1 - Name: Write the title you want your questionnaire to have. The system will not accept names that have already been used. If necessary, you can click on  and enter translations for the title, in Portuguese and Spanish.
Field 2 - Version: You can fill this field with numerals or letters. This will help identify versions whenever the survey is edited and will make it easier for you to register.
Field 3 - Questionnaire mode: click on the icon indicated in the image to fill in this field. When you click on  the system will present four questionnaire options and you must choose which one you want. Check below the properties of each option.
- Appraised: the system will display a list of appraised for selection. It is interesting for you to compare evaluations, such as sector inspections carried out in different stores.
- Code: will require filling in a number to start an inspection. This code can be of any nature and will be associated with data collection.
- PariPassu Tracking: allows you to start the questionnaire by reading the PariPassu QR code. In this case, you can select products to link to the questionnaire. In this way, all information from the previous link in the production chain will be filled in automatically.
- GS1 Tag: will bring tag information from the reading of a bar code. It is most commonly used for product inspections.
Field 4 - Reference document: you can attach a file related to the inspection that will be available for consultation during the application, such as a technical sheet, SOP (Standard Operating Procedure) or general instructions on auditing, for example.
Score Settings
The second screen to be completed is the "Score Settings". Check below each field on this screen and how you should fill it in.
Field 1 - Do you want to calculate the score?: if you check this option, you will activate the score calculation for your questionnaire.
Field 2 - Hide score during the application: if you check this option, the person applying the questionnaire will not have access to this information.
Field 3 - Calculation basis: define the default value of grades: 10 or 100, for example.
Field 4 - Decimal places: define the decimal places of the note, you can choose that it does not have decimal places, has one or two places (example without decimal place: 75; with one place: 75.5; with two places: 75 ,58).
Field 5 - Setup mode: choose if you want the system to present the score in percentage or in points.
Field 6 - More Configurations: this option allows you to establish evaluation ranges such as: good, regular and bad, or approved/failed, for example. It is possible to send email alerts for each rating and assign different colors to the bands. See the process step by step:
Step 1: Click "Set up Ratings" and then click in ![]() . The system will display the "Limits for grades for questionnaire applications" screen.
. The system will display the "Limits for grades for questionnaire applications" screen.
Step 2: Click, hold and drag the button ![]() to set the limits.
to set the limits.
Step 3: Click "Add" to add a track. To add more tracks, repeat the procedure. Finally, click "Confirm".
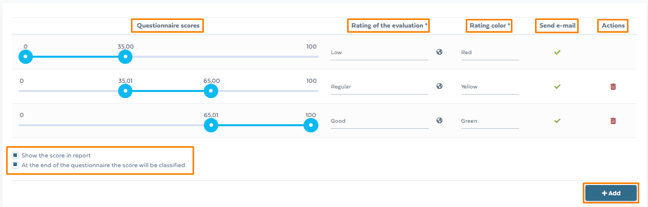
Note that both on the right side and below the banner, there are some fields that you can fill in to make your classification more personalized, they are:
- Rating of the evaluation: You can name the respective grade range. In the example of the image, we have:
- 0 to 35 as "Low".
- 35,1 to 65 as "Regular".
- 65,1 to 100 "Good".
- Rating Color: Select a color for each band by choosing one of the options in the field.
- Send email: sending email for each track is automatically activated by the system. To turn off, click on the icon
 once in the "Send e-mail" column.
 - Actions: it is possible to delete some added track, just click on the icon
 .
. - Show Score in Report: It enables display of the score in the report. This option is automatically selected.
- At the end of the questionnaire, the grade will be classified: this classification is carried out based on the classification of the evaluation that you nominated. This option is automatically selected, if you want to disable it, just uncheck it.
Field 7 - More score configurations: you can select the "Score calculation mode", we have two types:
- Default: the grade is weighted considering the topics;
- Tag: will consider specific questions, indicated by tags that can be related only to questions or to entire topics.
- Tags are used when, in addition to the application's total score, there is a need to obtain a specific score for a type of question or topic.
Tag mode requires the creation of criteria that will be used to establish an average between questions/topics.
Application Settings
The third screen will be "Application Settings". Check below the fields on this screen and how to fill it in.

Field 1 - Allow to attach documents: allows the person who will apply the questionnaire to attach documents to the questions during the application.
Field 2 - Capture geolocation when applying the questionnaire?: allows the system to identify the location of the application. In this case, you must select where the location will be captured:
-
- At the beginning of the application of the questionnaire.
- At the end of the application of the questionnaire.
- At the beginning and end of the application of the questionnaire.
Attention: Depending on the questionnaire mode you selected, the system may present other options.
You also may find the fields:
Field 3 - Restrict appraised: will require the selection of appraised to be made available for inspection. It can be done by list (of evaluated or products) or by groups. This option is visible in the "Evaluated" questionaaire mode.
Field 4 - Recurrence: it will indicate the previous answer in applications of the same appraised.
Recurrence control will still require some settings per issue.
Filling Options
Next, you must fill in the "Filling Options". Let's see the options below:

1. Quick filling: allows the person who will apply the questionnaire to indicate questions to be filled in with information from the previous application. This will be useful for recurring assessments.
2. Sequential completion: it will be useful to evaluate several products from the same establishment, as in a receipt inspection, for example. If you select this checkbox, as soon as you finish an evaluation, the system will automatically ask if the evaluator wants to start applying the questionnaire again, for the same evaluated person.
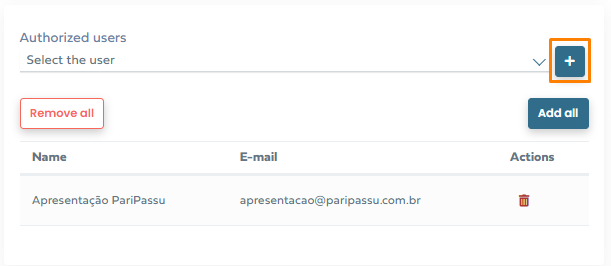
Authorized Users
They are the ones who can both initiate applications and edit the questionnaire. The questionnaire creator will be automatically inserted as "authorized user" by the system, but you can also include other users, just select the name in the main field and click on the icon ![]() .
.
The listing includes only CLICQ users, it is not possible to select the registration of an evaluated person, for example.
If you want to include all users, click "Add All". The deletion can be done by clicking on the icon or on "Remove all".
Report Settings
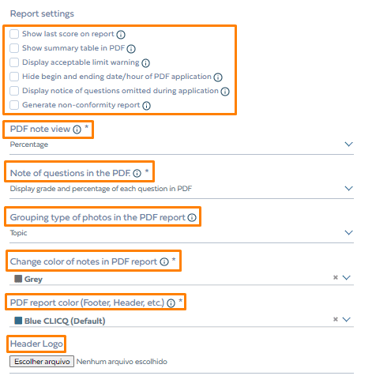
In this stage, several customization options will be displayed for the report that will be generated after the application, follow below.
- Show last score on report: will include a chart with the history of questionnaire applications, grouped by evaluated.
- Display summary table in PDF: will include a table with the summary of the score achieved in each topic of the application.
- Display acceptable limits warning: it will include alert about extrapolation of the acceptable limit, configurable in sampling questions.
- Hide begin and ending date/time of PDF application: will exclude application start and end time information.
- Display notice of questions omitted during application: will include information about questions that were not completed.
- Generate non-conformity report: will generate an additional report, including only questions that have not reached the maximum score.
Check below the fields, you will have to fill in:
1) PDF note view: indicate whether you want the score to be displayed only as a percentage or as a percentage and points. If you have configured the score in percentage mode, only this display will be available.
2) Notes of questions in the PDF: configure the display of the note for each question. You can choose to display grade and percentage; display note only; display only percentage; or omit grade and percentage.
3) Grouping type of photos in the PDF report: select if you want the photos to be displayed next to the questions or grouped by topics.
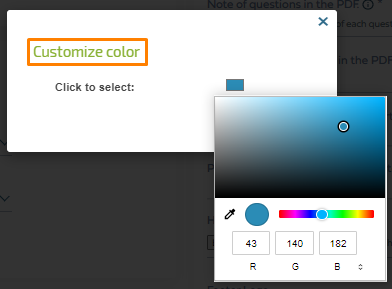
4) Change color of notes in PDF report: You can select a color to highlight notes and make information easier to identify.
5) PDF report color: Select the highlight color. If you choose the "Personalize" option, click on the rectangle and then select the desired color using one of the options: the selection keys highlighted by the circles (just click and drag to the desired tone); the dropper option to identify any color on the screen (just click on the desired area to copy the color); or filling in the RGB values.
6) Header Logo: Click "Choose File" and select the images you want to be displayed in the header and footer of the report.
Email Settings
In this step, it is possible to configure addresses that will receive the application report. Check the fields below:
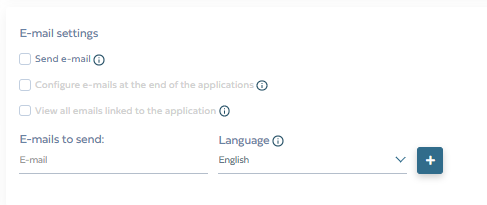
Field 1 - Send e-mail: you can allow forwarding e-mails to registered contacts. To stop sending, just uncheck this option, without the need to delete the registered emails.
Field 2 - Configure e-mails at the end of the application: select to allow the person who will apply the questionnaire to include e-mails for sending the report at the end of the evaluation.
Field 3 - View all emails linked to the application: you can select this option so that all addresses to which the report is sent are listed in the body of the email.
You may also find the option:
Field 4 - Send e-mail to the evaluated person?: you can select this option to send the questionnaire application report also to the evaluated address.
In the "Emails to send" field, you can select the language you want the report to be created in and then click on the icon ![]() . You can include as many addresses as you want and delete one by one, clicking on .
. You can include as many addresses as you want and delete one by one, clicking on .
Groups
In this step, you will be able to link the questionnaire to the evaluated and users who will apply the questionnaires, before linking the group it is necessary to create the group.
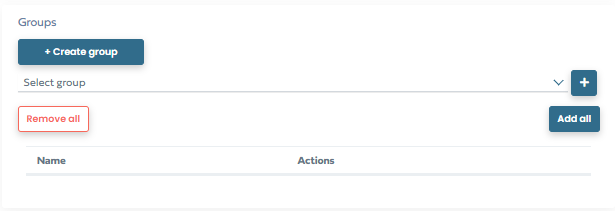
To link, select the desired group in the main field and click on the icon ![]() . You can also add all registered groups by clicking on "Add all".
. You can also add all registered groups by clicking on "Add all".
If necessary, create a group by clicking on "Create group". To delete a group, click on or on "Remove All".
Products
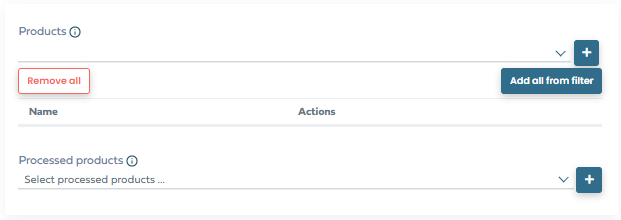
If you have opted for the PariPassu Tracking or Evaluated questionnaire mode, you can select the products to be linked to the evaluation, making it possible to start it from reading the QR code.
To do so, go to the "Products" field and type part of the product name, then just select it and click on the icon ![]() to add the product. If you need to delete one of the products, click on the icon
to add the product. If you need to delete one of the products, click on the icon ![]() .
.
To finish the general settings step, click "Next".
Configuration possibilities may vary depending on the permissions of your user profile. Please contact the Customer Success team if you need more information.
We hope this article was helpful to you! 🍎
If you have any questions, CLICK HERE to contact our Customer Success team! We will be happy to assist you! 🤗💙
See you! 🖐️